First Loaf of Sourdough

This week, I made my first loaf of bread from my sourdough starter. It was a tedious and time-consuming process that I had not anticipated while starting the process.

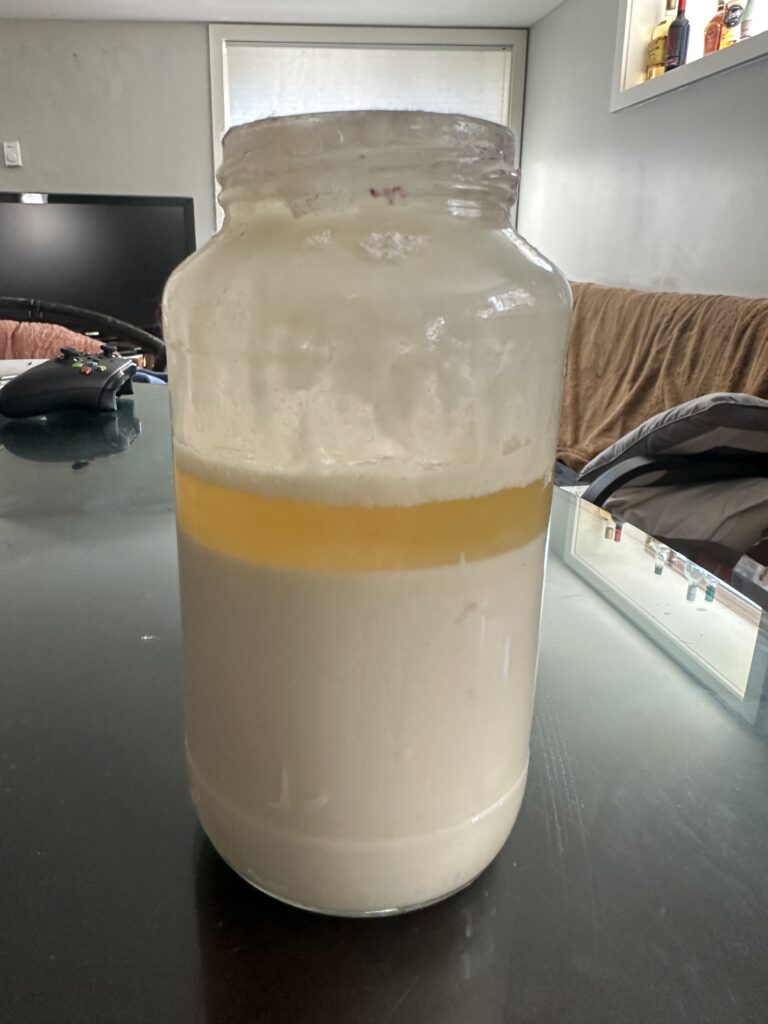
My first surpise was that my starter was not mature enough on the tenth day like I had though it would be. I found this out by dropping a dollop of dough into a glass of tap water and watching to see if it would float or not. Mine did not, meaning there was not adequate oxygen in the starter and it would not rise my bread. This process is referred to as the float test.

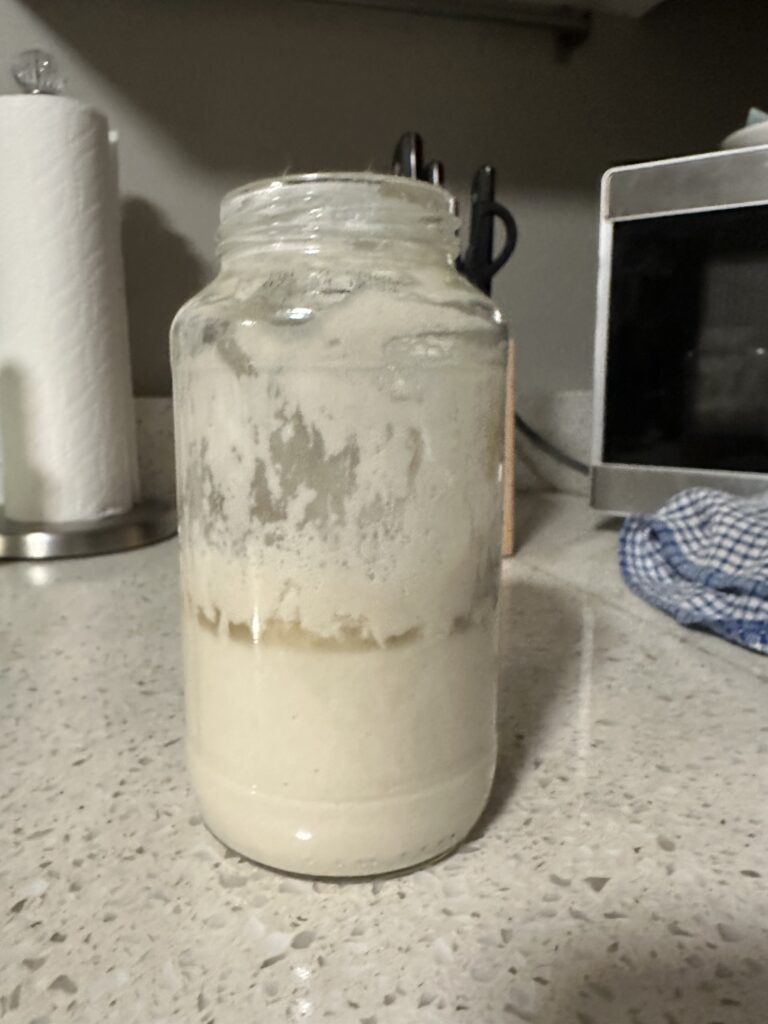
After reading some more, I supposed it was because my starter was too liquidy. To fix this, I added the regular amount of flour and half the amount of water compared to the usual 1:1 ratio. This thickened my starter overnight and the starter floated slightly longer the next day. Since my starter is still quite young, it will not reach the full potential of maturity quite yet. Becuase of this, i thought it was time I could try baking with it.

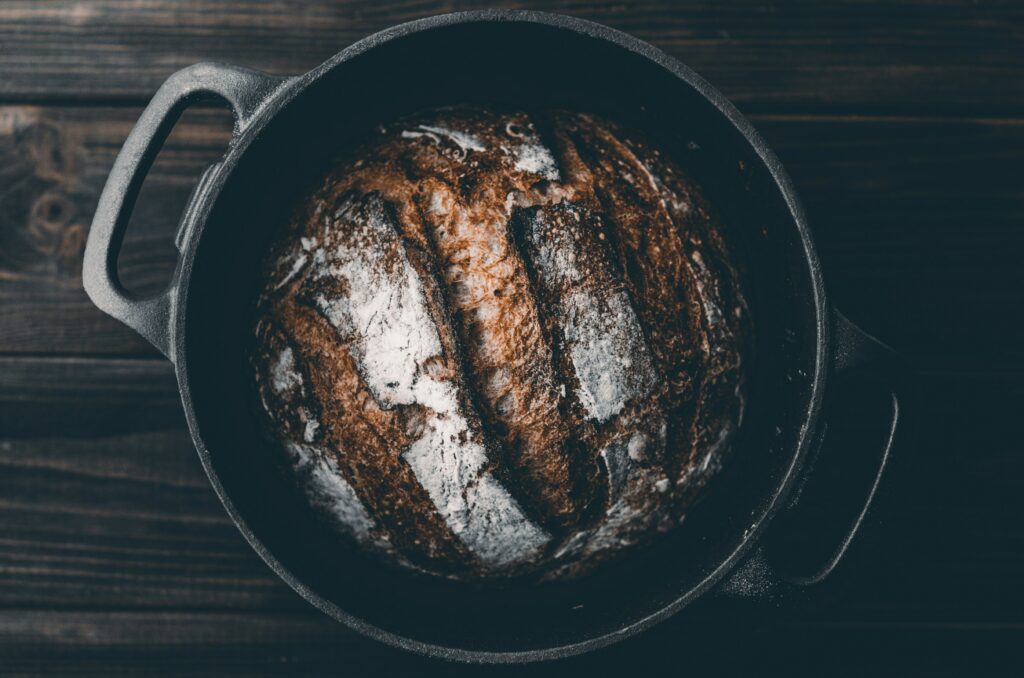
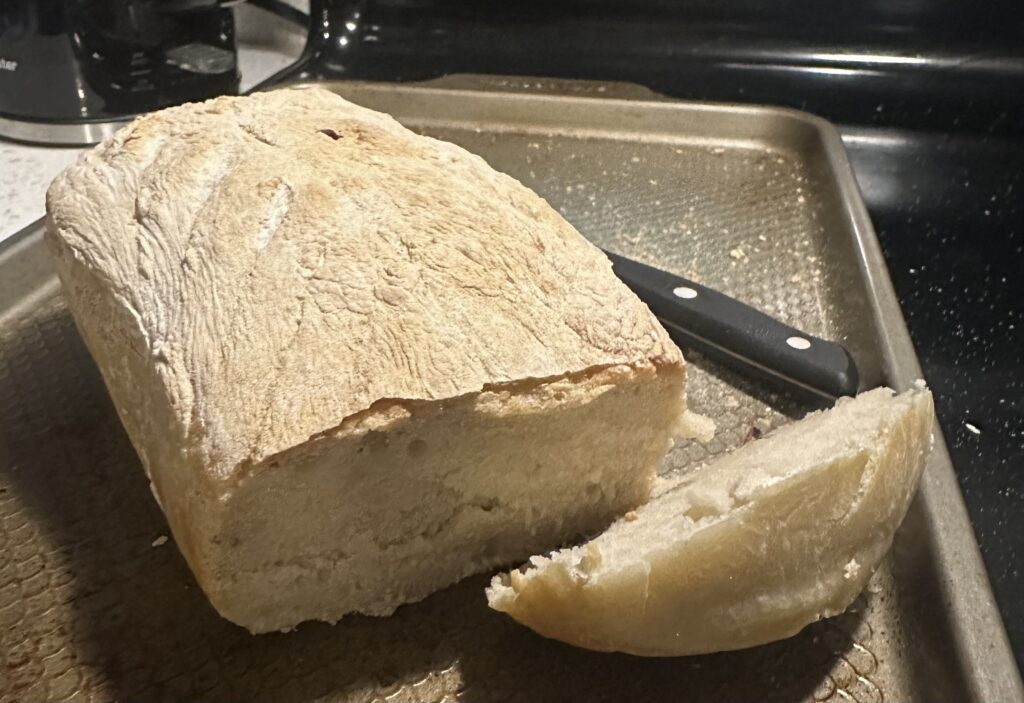
As I began the dough-making process, I quickly realized that this was going to be a much longer than I had planned for. Creating the dough was the quick and easy part of the process, It involved very few ingredients and steps, however the stretching, folding, and rising of the dough was done on a specific schedule and was a very lengthy process. I let the dough rise overnight and unfortunately no time to finish the process until later the next day, so I decided to refrigerate it until later in the night. I then had to do a new strategy of streching and folding before baking the bread for near an hour. Many people bake their sourdough in dutch oven pots, but the bread pan that I used instead took longer to cook in.

I was happy with the end result but will be making changes to it as I make new loafs. The bread did not rise as much as I had hoped and it became quite dense because of this. I also felt it was quite plain, so I am going to adjust the type of flour I use and add other ingredients to the dough before cooking.

You can find the recipe I followed here.

Online Accessibility

Brail text on white paper.

Photo by Mikhail Hilov on Unsplash.com

This week’s class on digital accessibility was surprising and informative. Throughout the class, I continued to realize the amount of online sites that are inaccessible to many individuals. When I think of accessibility, the first thing that comes to my mind is architecture and other structural components of communities, like brail signage, crosswalk signals, and elevators. However, these key components to daily life do not near the complex world of digital accessibility. 

Aspects of digital accessibility are often forgotten or missed while developing databases, websites, and resources. I believe this is because of the lack of confrontation that is involved with the online world. While looking at physical accessibility, it is impossible to avoid the interactions with disabled individuals, making it a more urgent focus. However, there is no pressure on authors and publishers to ensure all sites or databases are accessible to everyone. There is also much more focus on the security and risks of online content being leaked, manipulated, or effected by online viruses, which can often interfere with making documents and domains accessible. I found this concept quite surprising. As creators focalize on these points, accessibility is often completely forgotten or extremely inconvenient to navigate.

I found the Wave Web Accessibility Evaluation Tool to be an incredibly useful site to ensure the accessibility of your website. I was very surprised by the results I received for my blog regarding the colour contrast. While viewing my blog, I would not assume that it would be considered inaccessible to many individuals. While designing it in the first few weeks of class, I only considered the easthetics of it. This included the colours, fonts, and layout. Since my chosen cover photo consists of blues and whites, I focused the appearance of my blog to the colour blue. The overlapping shades of blue and grey can be difficult to see when individuals are visually challenged. Even after modifying my blog, The Wave Web tool still found countless aspects that reduced the level of accessibility. I also noticed that the majority of these aspects are related to the WordPress format provided, in which I am unable to edit any further. To analyze your own website with the Wave Web Evaluation Tool, click here.

Below is a video i created from a previous blog that I have now added closed captioning to in hopes of making it more accessible:

3D Printing Reflection

Above is a photo of the keychain that I designed on Tinkercad.

This week, we had the opportunity to work with 3D printing technology in the library. This was a fun and interactive class that allowed for a lot of engagement. We started class by learning how to navigate the Tinkercad website, where we designed our own 3D projects. The website was easy to navigate as a beginner with only a few setbacks throughout my formatting. 

3D design is a unique and innovative tool in terms of language revitalization. It allows us to create symbols and letters that are not accessible through keyboards. Although the letters and symbols could be presented by drawings and prints, 3D models allow for a hands-on experience while looking at these topics. This encourages more student engagement and understanding. An example of this is using 3D printers to create Indigenous dialects that can be brought to class and incorporated into lessons. The University of Alberta provides an example of this by creating and supplying 3D printed Cree syllables in kits that are accessible through their library. Learn more about their approach here

Using 3D design and print in elementary grades has many upsides and downsides. When working with these machines in an elementary setting, it is important to educate students of the safety precautions that must be taken. It is easy to be burnt or pinched while accessing projects and some machines can be hard to turn off or override when needed. While teaching in primary grades, platforms like Tinkercad could be useful as a teacher resource, but I do not think they would be fit for a student resource. This is because of the complexity of the programs and the process of getting the 3D object to the machine for printing. As a teacher, it could be beneficial for creating classroom tools and activities. It can create game pieces, die, fidget toys, decorations, and more that can add excitement to primary classrooms. In secondary grades, the programs could be quite useful in various classes. I see the purpose in including 3D printing lessons into elective classes like intro to engineering, art, media arts, and tech ed. Although it is not an essential skill, it is useful and entertaining to students interested in further pursuing digital arts or programming. 

 Below is a video discussing the safety measures that should be taken around 3D printers:

Sourdough Starter Progress:

My second sourdough starter has been much more successful so far. I have noticed more bubbles and it has begun to smell like bread. This is much different from my first attempt, as it continuously smelled rotten and developed no bubbles or culture. I have been feeding it much more regularly and using proper water in the process. I am now on the sixth day of my starter and it will be ready to bake on the tenth, so I am hopeful of the success of my second starter. 

While doing regular research on my project, I realized that the liquid forming on top of my starter is referred to as a “hooch” and it does not signify that your sourdough has gone bad. This is visible in the photo of my starter included above. Stephanie Bruce from Gathered in the Kitchen discusses how starters forming a hooch is a normal process and that it signifies that the starter is hungry. She also states that it can easily be drained from your starter. Up until now, I have been stirring the hooch back into the starter, which can decrease the chances of success. This was a useful tip for me, and you can find many others from their website linked below: 

Trouble Starting Sourdough

Starting sourdough is a tedious process that requires you to attend to it each day, at least for the first 10 days. My sourdough starter was alive and well for a total of four days before I missed a day of feeding and, unfortunately, it died. However, I have taken away some valuable lessons from this and have a better chance at keeping it alive during my second attempt.

Throughout the past week, I made two mistakes that lessened the chance of my starter staying alive. My first mistake happened right at the beginning. I started my sourdough after 12am on the weekend, not thinking about how the starter works on a 24hr clock. This made it so that when I fed my starter each day, it would have to be the very last thing I did before bed, and it was often still too early. I was feeding my starter at the wrong time and also forgot on the last night because of the schedule I had created. This time, I began the starter at 6pm, a time that i am always home and usually cooking dinner, making it convenient for me to feed it.

The second mistake that I made was the type of water I was using. To properly start your sourdough, you must use distilled or bottled water due to the harmful chemicals that are present in tap water. When I first used tap water in my sourdough, there were almost no bubbles, which signified that the yeast was not activated and fermentation was not happening. When I switched to bottled water, the mixture seemed to ferment much faster and also produced a better smell than my previous one.

See tip #2 of Abigail’s Oven to learn more about the water you should be using in your sourdough (the other tips are helpful too!)

Generative AI & Learning Reflection

Photo by Igor Omilaev on Unsplash.com

Generative AI is a difficult tool for students and teachers to navigate in an educational setting. Although it can be useful, it is challenging to monitor how students utilize it. This is often why teachers and professors forbid the use of AI. However, suppose instructors take their time to explain, practice, and create content using AI. In that case, students can develop a more profound understanding of how to strengthen their work without committing academic dishonesty.

While reflecting on my use of AI, I remember times when it was helpful to me, but also times when I could have chosen a better option. ChatGPT specifically, has been helpful in generating prompt ideas and subheaders for my work. However, when asking AI tools for assistance in solving difficult questions, it has often provided me with incorrect information. In any of these situations, I still felt I was nearing academic dishonesty. Due to the lack of education I had received surrounding AI tools, I always felt nervous about using any AI-generated assistance with my schooling or work when not instructed to do so.

After learning more about how we can properly use AI in an educational setting, I can identify how it will be useful as a teacher and potentially to my students. I hope to properly incorporate lessons on the use of AI when I begin teaching so that my students can understand it, use it, and not be worried about committing academic dishonesty or collecting incorrect information.

Check out this short video by ILLC Science on a few rules to follow while using AI here:

Friv.com Tutorial

During this week’s class, we created short tutorials using Screencastify and the H5P tool found on WordPress. Below is a link to mine:

Through this short tutorial, we learned to use the Google Chrome extension, “Screencastify,” as a tool for screencasting, as well as the H5P tool that is accessible through WordPress.ca. This tool allowed us to add notes, questions, or comments to the screencast videos we produce as classroom content.

I hope to teach a variety of age groups throughout my teaching career, and I think platforms like H5P could benefit them in different ways. In lower grades (k-4), I would use these platforms to my own advantage while creating lessons involving videos that will be shown in class. In older classes (5-7), there is more opportunity to create Screencastify tutorials for different websites or platforms we are using and even to have students create their own screencasts. Learning to navigate these tools can be beneficial to future teachers in many different scenarios. One that comes to mind would be while students/teachers are absent or during emergencies like a global pandemic, which we recently experienced. it allows teachers to provide more guidance and increase clarity while students are learning from home or in a self-paced environment. This could also make instructions much easier while in a large classroom or while assigning complex homework assignments.

Multimedia learning refers to the concept that employing multiple media types (verbal, text, images, icons, etc.) allows for a deeper understanding and more retention of information. The main idea is based on two theories, information processing and dual coding, which consists of several main learning principles. These principles outline how an instructor can employ multiple types of media in lessons without distracting from the main objectives or overloading the intake of information. Considering these principles while developing lessons and courses can create a more effective learning environment for students by making concepts engaging and clear, and later applying them to logical concepts that force information to resonate with children, therefore remaining in their long-term memory. Applying this theory to videos and tutorials will reduce distractions, information overload, and the overall lack of understanding. Distractions in videos and tutorials can occur when irrelevant information is added, faces are visible in the frame, and the same information is presented multiple times. Avoiding these key factors can majorly improve the quality of lessons and students’ retention of information. Learn more about the Multimedia Learning Theory from the video below:

Inquiry Project Ideas

Photo by Arturrro on unsplash.com

While planning for the inquiry project, many ideas ran through my head. I enjoy healthy cooking and fitness, so I first thought of tracking runs and workouts or learning how to cook and developing a collection of recipes. Both of these choices would have allowed me to benefit myself through a school project, which is a great opportunity to take advantage of.

Since I am new to living off-campus, I thought bettering my cooking abilities would be more beneficial to me than documenting fitness. While starting to plan for my project, I realized that less broad topics within cooking would be easier to document progress and also less of a financial burden while in school. Because of this, I began researching ongoing projects that could be convenient and enjoyable while tracking my progress and learning.

This led my research towards sourdough bread. Making sourdough bread is an interesting process that can last millenials. It also benefits my household as we will no longer need to buy loaves of bread when we have consistent batches of sourdough available to us. You can also learn to make different types, shapes, and designs of sourdough bread, as you become more and more confident in the process. This allows for a lot of growth and progress that can develop throughout this semester. Making sourdough bread is also a skill that I can continue to practice and enjoy beyond this course project.

To begin the process, I read this blog by Nick and Ashley from Riggin Farm

They describe the science and history of the complex process of beginning, maintaining, and creating bread from sourdough starter. They also make the article accessible and enjoyable by including many images, relating to their own experiences, and maintaining simple diction that is easy for readers to digest. They explain the process from the beginning of creating the sourdough starter to maintaining the active yeast and making bread whenever you wish. It is a great resource for anyone new to the practice who would like to learn about more than just the process of creating it.

Topic #2 Reflection

Photo by Jeswin Thomas on Unsplash.com

Knowledge is an everchanging aspect of human nature. It continues to grow, change, and develop into complex ideas that form our identities. Education and pedagogy, being the transmitters of knowledge, should follow this trend of growth as well. However, we continue to practice a very traditional style of education. Greg Whitely’s documentary, “Most Likely to Succeed,” challenges this mainstream model of education in an informative and thought-provoking way.

I never considered whether re-imagining education was necessary, however, this film provides a compelling case. The educators of High-Tech High did face obstacles while attempting to remodel pedagogy. This included skeptical parents, not reaching all curriculum criteria, and adjusting students to the self-guided education they were immersed in. Initially, I had concerns about whether this method would properly prepare students for SAT exams and post-secondary education. After reflecting on my own adjustment to University, I realized that the grit, perseverance, and individual motivation they learned would benefit them more than the coursework involved in the generic curriculum.

The start of High-tech High was a well-thought-out program that ensured the proper education of students. They followed a more robust approach to education, consisting of soft skill development and application of concepts. Soft skills include critical thinking, confidence, the ability to collaborate, and more, which all contribute to an education that resonates with students. With this different learning environment, students can become self-motivated and independent before post-secondary education, setting them up for success. On the contrary, students who are not self-motivated may be less successful in this learning style and there is no guarantee that all curriculum content will be delivered.

The traditional education system would need to be permanently modified for a remodel like High-tech High to reach its full potential. Although the film successfully remodels education for high school students, there is still a lot of progress necessary to remodel elementary education. Solidifying new models would begin creating citizens with true innovative thinking, providing more to communities and increasing chances of career opportunities. The base-level education publicly offered does not suit current-day standards of knowledge, making the system problematic in itself. Our knowledge is ever-changing, therefore the curriculum and education system should also be.

Watch the film through the Uvic Library here.

Welcome and Introduction

image showing person walking in pre-painted footprints

Before proceeding with this first blog post, we expect you to consider your privacy preferences carefully and that you have considered the following options:

  1. Do you want to be online vs. offline?
  2. Do you want to use your name (or part thereof) vs. a pseudonym (e.g., West Coast Teacher)?
  3. Do you want to have your blog public vs. private? (Note, you can set individual blog posts private or password protected or have an entire blog set to private)
  4. Have you considered whether you are posting within or outside of Canada? This blog on opened.ca is hosted within Canada. That said, any public blog posts can have its content aggregated/curated onto social networks outside of Canada.

First tasks you might explore with your new blog:

  • Go into its admin panel found by adding /wp-admin at the end of your blog’s URL
  • Add new category or tags to organize your blog posts – found under “Posts” (but do not remove the pre-existing “EdTech” category or sub-categories, Free Inquiry and EdTech Inquiry). We have also pre-loaded the Teacher Education competencies as categories should you wish to use them to document your learning. If you would like to add more course categories, please do so (e.g., add EDCI 306A with no space for Music Ed, etc.)
  • See if your blog posts are appearing on the course website (you must have the course categories assigned to a post first and have provided your instructor with your blog URL)
  • Add pages
  • Embed images or set featured images and embed video in blog posts and pages (can be your own media or that found on the internet, but consider free or creative commons licensed works)
  • Under Appearance,
    • Select your preferred website theme and customize to your preferences (New title, etc.)
    • Customize menus & navigation
    • Use widgets to customize blog content and features
  • Delete this starter post (or switch it to draft status if you want to keep for reference)

Do consider creating categories for each course that you take should you wish to document your learning (or from professional learning activities outside of formal courses). Keep note, however, that you may wish to use the course topic as the category as opposed to the course number as those outside of your program would not be familiar with the number (e.g., we use “EdTech” instead of “edci336).

Lastly, as always, be aware of the FIPPA as it relates to privacy and share only those names/images that you have consent to use or are otherwise public figures. When in doubt, ask us.

Please also review the resources from our course website for getting started with blogging: