Final Reflective Free Inquiry Post

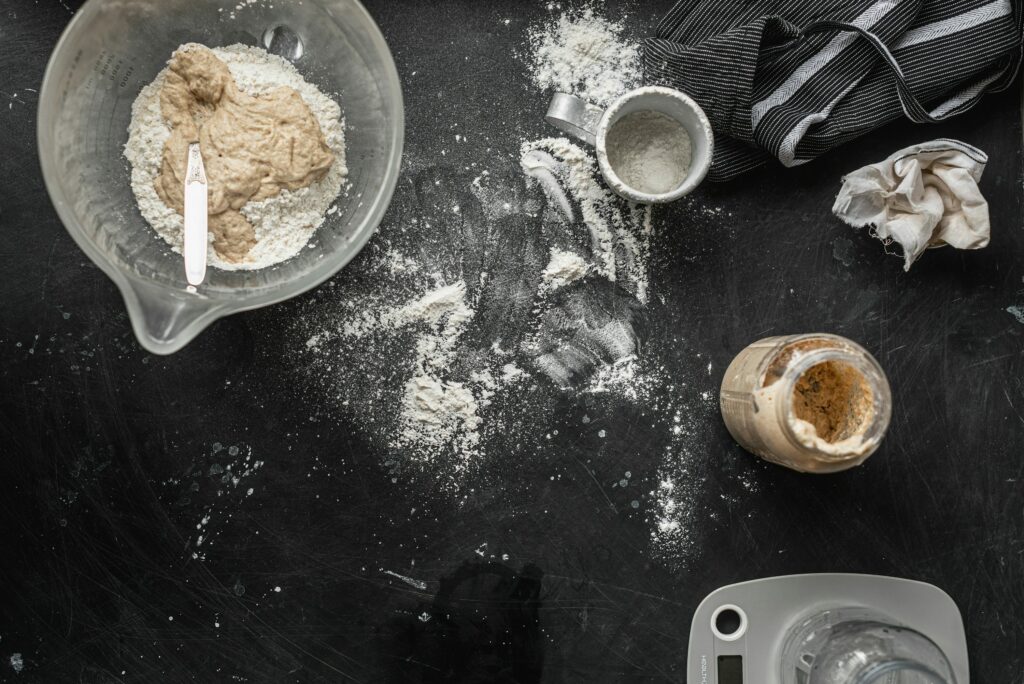
white ceramic mug beside clear glass bowl

Photo by Anshu A on Unsplash.com

Overall, I am proud of my success throughout my sourdough bread-making journey. I started by creating my own starter, which is not a process for the weak. It required extensive effort and daily care to grow the starter in the beginning, which took me two tries to get right. After this stage, it still took another week or two to strengthen my starter enough to make bread with. My first loaf was extremely unsuccessful due to my impatience. It was necessary to wait until my sourdough could successfully pass the float test before making bread, and once it did, my bread was completely different. I did make a few good loaves of bread that I enjoyed, but I wish I could try making them in a Dutch oven to see if it would change the composition of the dough and potentially reduce the size of the air bubbles that I always had in my bread. This would make the bread more useful as I had hoped to replace the bread that I bought from the store at the beginning of my project, but never fully could. 

Throughout the semester I faced many setbacks in my sourdough. These included the over-development of my starter’s hooch, forgetting to feed my dough, feeding with the wrong flour or water, getting feeding proportions wrong, failing to pass the float test, and messing up the rising process of the dough. Below are a few sources that helped me with these setbacks:

  1. A blog for beginner sourdough bread makers
  2. A blog I used when creating my starter
  3. A blog that helped with starter hooch

I hope to continue making sourdough and eventually get a Dutch oven and kitchen scale to make the cooking process and proportioning more successful throughout the process. I plan on continuing to maintain both of my starters and to make bread with them every once in a while. I found this project very informative and engaging while going through several different trial-and-error processes throughout the semester. I appreciate the opportunity our class had to learn something new and entirely out of our comfort zones.

Final Reflective Sketchnote

My final sketch note presents three different aspects of the course that resonate with me; weekly topics, my inquiry project, and the group project (assignment 2). The weekly topics are connected by the dotted-line arrows that fill the page. At the top and to the right of the page, you can see two separate clouds. These have the inquiry and group project in them to separate my ideas and findings entirely. I am okay with my sketch note being shown to future ed. tech. classes.

Comparing Starters

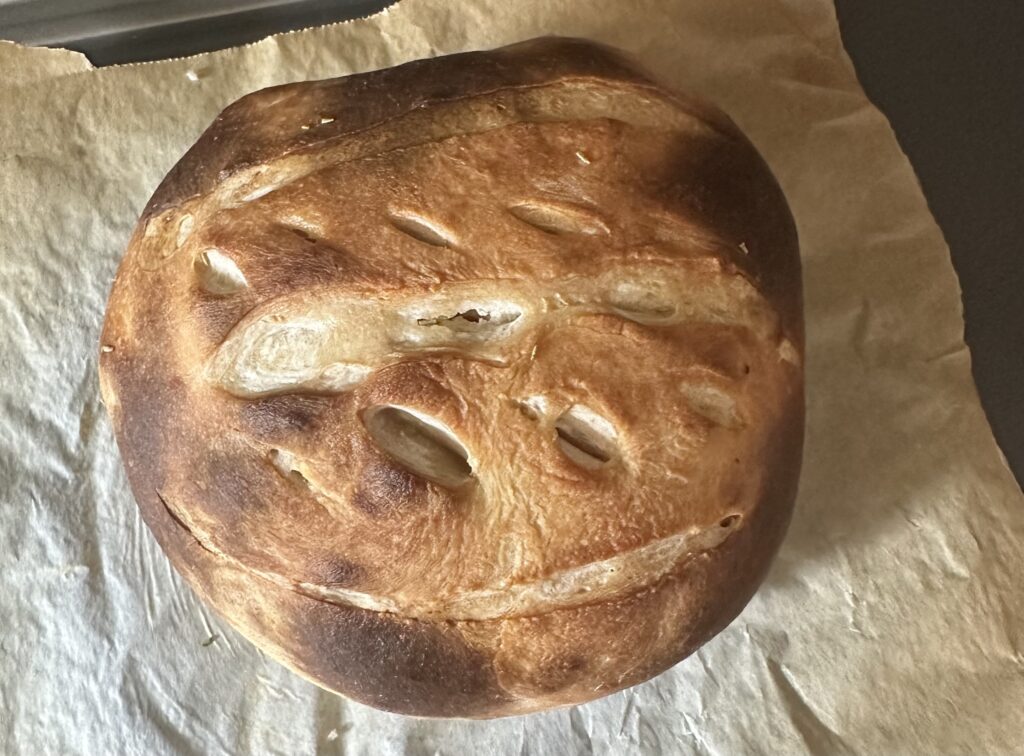
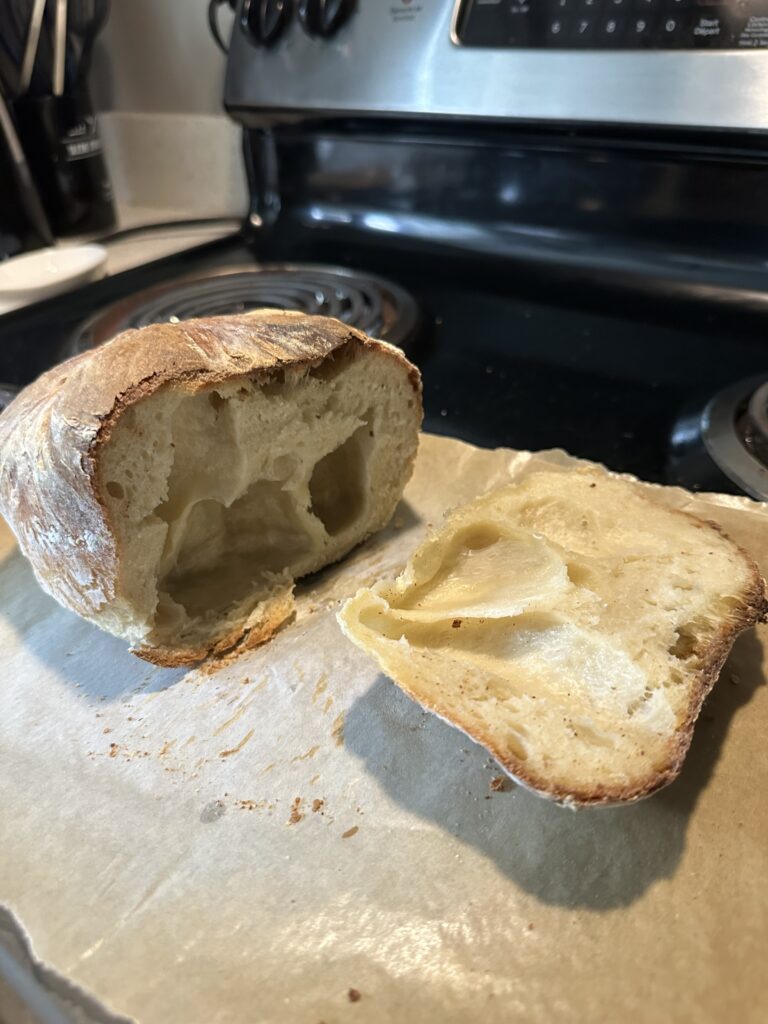
Above is a photo of my original starter’s loaf. Notice the large air pockets.

In the past two weeks, I tried making a loaf with each of my starters. I hoped for both of them to pass the float test, rise during the dough process, and form properly while cooking in the oven. However, I was not feeding my starters throughout the break and refrigerated them too long, causing my second starter to lose a lot of the progress that it had made. 

Because of this, it did not pass the float test after 24 hours on the counter with two feeds. I tried making a loaf with it anyway and it did not go well. Firstly, the dough was not rising or heating up after resting and it had no stretch when I did the pull and fold rotations. After letting the dough sit overnight, it only rose in the slightest but the starter seemed to be coming back to life and the dough smelled usual, so I cooked the bread anyway. It cooked similarly to my first loaf when it failed to rise and produced an incredibly thick, heavy, and doughy loaf of bread.

Fortunately, the bread that I made during the week before reading week using the original starter turned out quite well. It is photographed at the top of this blog post. It has large air pockets and smelled amazing while cutting into pieces than any of my prior loaves. One issue I am having is that the air bubbles are too big. This could be from preparing the dough incorrectly or from letting it rise for too long.

As I continue to progress through my sourdough-making journey, I continue to learn new things with each loaf and each setback that I approach. I have learned so much already and will learn from adjusting the dough each time, hopefully, to eventually perfect my sourdough loaves.

Digital Devices In School

Above is a photo of the activity I chose to follow on the Arduino Science Journal App.

While technology continues to advance, more electronic devices are being used frequently in schools. These are both educational tools and personal devices that students bring with them. There are pros and cons to having both of these technologies in schools that are continuously debated across school districts. At this point, most districts have their own regulations and rules surrounding the use of these devices which vary between elementary, middle, and high school. 

Technological devices are beneficial to schools as they allow for quick and easy internet access, leading to a broad realm of research and various educational resources that can make learning more exciting and engaging. It also allows for varying project designs and platforms. Examples of this include Prezi, Canva, Google Slides, and more. Having various forms of projects and lessons can create a more engaging learning environment that incorporates multimedia aspects. Personal electronic devices allow classes to participate in hands-on group activities like Kahoot! and IClicker which allow students to participate in stress-free quizzes that help increase knowledge of a topic or prepare students for tests. 

While considering the incorporation of technology into schools, it is also important to think about the negative aspects. Allowing students to carry personal electronic devices in class can create a great distraction. They also increase the chances of bullying and harrassment as they allow access to social media during school. Computers in schools can be hard to regulate and monitor as students have free access to anything on the internet. It is common to block access to certain pages on school district computers, but you can never be sure what students might find. Keeping up with computers and other electronic devices in schools can also be extremely costly. This is because of the fees applied to purchasing, installing, fixing, and replacing all devices and their accessories. 

I think that technology is an important aspect of learning that should be incorporated into schools to better prepare students for future schooling and careers, which almost always involve technology and a basic understanding of how to navigate it. Rules surrounding phone usage should be considered to a certain extent, and teachers should have the most control over phone usage during their class time. I believe this because it can often be helpful for specific activities or lessons, but is not always necessary. Overall, technology is used for such varying aspects of education that there is no simple answer. There must be a clear and thought-out plan for how to incorporate it into class and when to draw the line.

Classroom Management & Inquiry

Photo by RDNE Stock project on pexels.com

Managing a classroom can be done in an abundance of ways. How you manage your class can dictate the relationships you build with students, the quality of work students produce, and the atmosphere that develops. Every teacher manages their classroom differently, but many commonalities among them create the learning environment necessary for students and teachers to succeed. 

Brittany Johnson’s presentation shows many great classroom management techniques that I see being used often. This includes the SEL check-in that I see in my own classes and at my Link2Practice school. I like this tool as it allows students to express something about themselves during the first few minutes of the school day. My mentor teacher always takes a few minutes to allow students to reflect on the image they picked and why they are feeling like that. This provides students with the opportunity to let others know something exciting that happened to them or a reason they may not perform well in school that day. There are several different templates and ideas for SEL check-ins online. For example, here is a blog I found myself with several different templates that you can edit and use.

Four Pillars of Inquiry Based Learning - Explore a passion - Aim for a goal - Delve into your curiosities - Take on a new challange

The Four Pillars of Inquiry infographic above is easy to understand and a good tool for students to use while beginning an inquiry project. These open-ended assignments can often be hard to start or feel misleading as there is so much opportunity for choice, which students are often not familiar with. The four steps can be easily followed while trying to develop an idea and plan, however, students will need to delve deeper into the meanings of each step to properly gather their ideas and generate a clear goal. This can be done through a class discussion or a video like the one we watched. Both options are accessible, and while communicating an essential message, they are still visually pleasing and engaging to discuss.

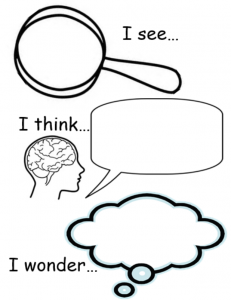
See - Think - Wonder worksheet

Photo by The Curious Kindergarten

I sparked interest in the See, Think, Wonder template as it is useful for any skill level and it successfully gathers a student’s ideas without any force or confusion. I think this template would work well for me, as well as any other grade level. This is because of the diverse opportunities that the layout gives you. It allows drawings, bullet points, or typed paragraphs as guidance while you create your self-inspired inquiry question. I would use this often while attempting to encourage students to generate their own feelings, opinions, and questions surrounding a topic.

Two Starters

Unfortunately, this week I was not able to make a sourdough loaf due to sickness. Although, as I mentioned in my last post, I recently divided my starter into two.

I thought this would be an interesting topic to discuss because I learned a lot more about the ratios and functions of sourdough starters. I never weigh my portions because I do not have a scale which is a really helpful tool to perfect your portioning. However, I realized that I had not been feeding my sourdough properly. After beginning, I continued to remove 1/2 cup of starter and add 1/2 cup of both distilled water and flour. I learned during this change that the ratio your starter should maintain is 1:1:1 of flour, water, and starter. There are many other ratios that people decide to use that better suit their bread but this is the most common one, especially for beginners like myself. This explained a lot to me because I felt like my starter was outgrowing the jar I had started it in. This was due to me adding more than I was removing each day.

Because of this, I moved 1/2 cup of starter into a new jar and added 1/2 cup of water and flour, perfecting the 1:1:1 ratio. I started this only a day before making my last loaf, which was my most successful. But as I had mentioned, the older starter passed the float test and the new one with proper ratios did not. I made the loaf with my older starter and it rose well and had plenty of air bubbles.

After that experience, I thought my second starter might die off and I would continue with my original starter. Additionally, while I was sick this week, both of my starters were neglected and I did not feed them for two days. I was worried they may have both died and that at least my second one had. But after looking at them again today, my second starter has grown and become a stretchy and thick consistency with a strong yeast smell, meaning it is strong and potentially ready to bake with. It appeared to be even stronger than my original starter.

I am excited to see which starter is stronger and am planning to make a loaf with each and assess which one makes a stronger bread with consistent air bubbles and rising.

Beginner Coding

Photo by Lukas on Pexels.com

Computer coding is an interactive and applied skill that can engage students, improve their computational thinking and problem-solving skills, and assist them in mathematics. After viewing several different sites and formats for beginner coding, it is best to teach in upper-primary classes that already have a foundation in reading and math and are familiar with computers. Computer programming involves extremely specific instructions that a computer database can follow and generate a visual. The instructions you provide must be exact because computers do not have the ability to solve problems logically. Simple instructions can be followed by people but technology does not think like this. This makes students have to re-attempt their code multiple times until they succeed. This assists in the development of students’ problem-solving skills and can contribute to their computational thinking. 

Scratch is an easy-to-use coding program that simplifies the process and makes it more accessible to children. It provides different forms of games and activities that engage students, which motivates them to find interest while they are doing it. Activities like this are fun for classes to do together and students often do not feel like they are actively learning when in reality it provides them with a great basis of technological knowledge and problem-solving skills.

I used a platform similar to Scratch and coded a variation of the Flappy Bird game. You can try it out here.

Second Loaf

My sourdough progress this week was like no other. It began with my first time refrigerating my starter. Once your starter is developed enough to make bread, you can refrigerate it for multiple days without feeding, reducing the waste of new flour and water.  What I did not realize was that you cannot create bread without allowing the starter to sit out and be fed for two days. This delayed my sourdough process a lot and made it more difficult to bake the bread during the week rather than the weekend as I had planned. 

I also took a portion of the starter and tried making a second one that could be smaller and easier to manage. However, when I put both starters through the float test, the original starter passed and the new one did not. This was really exciting because my starters had yet to pass this test sufficiently enough to make good bread, and this signified that they could finally reach their full potential. This would fix the problem of the bread not rising properly that I faced a week prior.

Although I feel this loaf was very successful, I still made a few mistakes in the process. The first one was taking the starter out of the refrigerator too late which delayed my plan. The other big mistake I made was leaving the dough to rest overnight before shaping it, which could have affected the rising and cooking of the bread. You can find a description of this process in the recipe I used here. Another problem I have continuously faced throughout the semester is not having a kitchen scale and a Dutch oven pot. These kitchen appliances are not essential, but extremely helpful in the sourdough-making process, and I wish I had known that before beginning.

The process of making the dough was tedious and lengthy. It takes around 48 hours before having a cooked loaf, involving several rounds of allowing the dough to rise and folding the dough with a specific technique. I did the steps slowly throughout the week when I found time and did not follow them as well as I could have if I had done it on the weekend. This may have affected the bread in some ways, but it rose enough and the bread turned out delicious.

TPACK Model & Sketchnoting

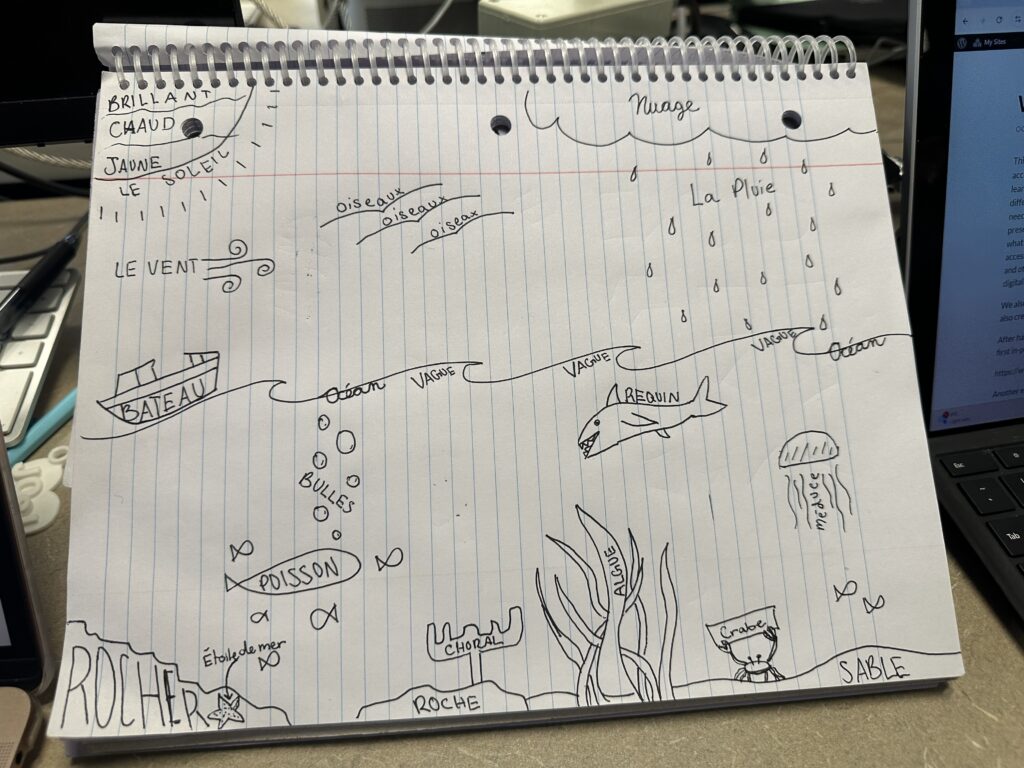
Above is a photo of a sketchnote I created in class. It provides an ocean themed french definition page that allows students to learn new words in french without simply reading them. This is a more fun, interactive, and engaging method of translating information that could be used as a substitute for spelling tests and as a guideance for themed journals and projects. Using sketchnotes can benefit elementary grades by creating content that students find interest in and when having them create their own to help make meaningful connections to subjects and increase comprehension and retention.

A second subject we covered in class was pedagogical evaluation tools. The TPACK model is a method of evaluating educational content through technological, content, and pedagogical knowledge. These three components combined allow educators to promote student motivation and the accessibility of the content they create. Although the model is a useful tool to ensure that your content is engaging and accessible, I think you would have to have a really good understanding of each component to use it properly. However, the SAMR model that we also looked at in class takes an easier approach that is more accessible to educators with less background knowledge of the model. It allows you to rank the strength of the content out of 4. These four levels consist of substitution, augemntation, modification, and redefinition and are well described in a model illustrated by Sylvia Duckworth. You can see this model here